Quick start
Two short tours: the one-click route that does everything for you, and the hands-on route where you place the seams yourself. Both take a few minutes on a sculpt of millions of triangles.
Open a mesh
- Click Open in the top bar (Ctrl+O), or drop an OBJ, FBX, STL or Alembic (.abc) file on the window.
- If the file already has UVs, Atlasmith asks "Use the UVs in the file?". Answer Start without UVs to start fresh, or Use its UVs to keep them (their island borders become the seams).
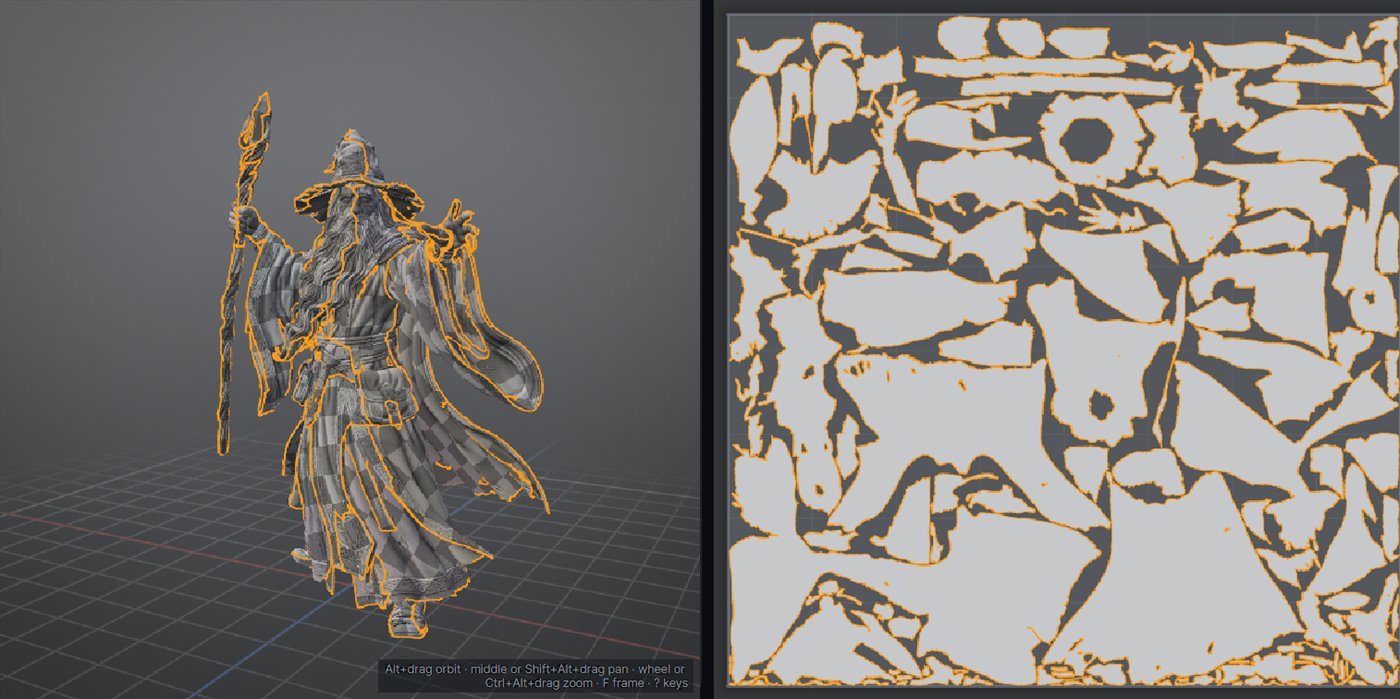
- The model shows in the 3D view on the left in a neutral clay; the UV view is on the right.
A huge sculpt? You may want a lighter low-poly first: see Simplify. Atlasmith keeps the original for the bake.
The one-click route: Auto unwrap
Use this when you just need good UVs for baking or texturing and do not care where exactly the seams go.
- In the side panel's Workflow tab, open the Auto unwrap card.
- Pick the mode: Automatic keeps every island under the max stretch; Mosaic cuts about the number of islands you ask for.
- Click Auto unwrap. Seams, unfold, relax and pack run in one go, with a progress bar (Esc cancels).
- Check the result: Alt+2 shows a checker on the model, Alt+4 the stretch. The UV layout is on the right.
The hands-on route: cut, unfold, pack
Use this when you want the seams where an artist would put them: behind the ears, along the inner arm, under the belt.
- Press 2 for Edge mode. Click an edge, Ctrl+click to add more, or double click to take a whole edge loop. Hold Shift and hover to preview the shortest path to another edge, then Shift+click to add it.
- Press C to cut: the selected edges become seams (cyan lines).
- Press U to unfold. Each region between your seams becomes one island, unfolded and relaxed in place. Islands you did not touch never move.
- Press P to pack the islands into the UV square.
Not sure where to cut? Select seams on the 3D bar proposes seams as an edge selection. Look at them, change the selection if you like, then C and U. See Seams.
Made a cut you do not want? Select the edges and press W to weld them, or just Ctrl+Z.
Save and export
- Ctrl+S saves the whole work as an
.atlasproject: mesh, seams, UVs, selection, cameras. Open it later and continue exactly where you were. - Ctrl+Alt+S (Quick export) writes
<name>_UVnext to the file you opened, in the same format, with no dialog. - Ctrl+Shift+E (Export…) lets you pick the place and format (OBJ, FBX or Alembic) and also writes the baked maps.
More in Export and projects.
Moving around
| Mouse | 3D view | UV view |
|---|---|---|
| Alt + left drag | orbit | pan |
| Middle drag | pan | pan |
| Wheel, or Alt + right drag | zoom at the mouse | zoom at the mouse |
| F / A | frame the selection / frame everything | |
A plain left click or drag always selects and never moves the view. Using a pen tablet? See navigation with a pen.
Where to go next
- The interface: what is where.
- Workflow overview: the seven steps and their cards.
- Keyboard shortcuts: every key on one page. In the app, ? shows the same map.